Friday, February 24, 2012

And The Winner Is.....

A couple of weeks ago, I asked my followers to vote on a paint color for my Nesting Tables and "Your vote will determine how I paint the entire set, WHITE OR GREY....


Well, the vote is in and by a margin of almost 2 to 1, GREY was the winner!!! 

So, here they are.....


Project #7 Completed!

Let me know what you think....

Sunday, February 19, 2012

Esty Giveaway

I'm thrilled to be hosting another Graphique giveaway....need I say more!

One of my favorite Etsy shops is Graphique and their endless selection of digital downloads for do-it yourselvers. These digital downloads are great for pillow covers but they can be used for tea towels, lampshades, pillowcases, furniture etc. Graphique features French Style, Animals, Birds and Insects, Words and Quotes, Holidays, Whimsical and so much more....They have 2,200+ images available for purchase.

Graphique specializes in old world graphic style digital download images that are done in high quality jpeg or png format for use on burlap, fabric, and just about anything else you can think of. Some of the images are redesigns and recreations of old images with added design elements. Some are new images actually created by Graphique to appear vintage. The digital downloads can be decreased or enlarged depending on your project. They are constantly creating new images.

Graphique is offering a $25 Giveaway for Digital Downloads. Just visit Graphique on Etsy and find your favorite image. Then come back and post a comment letting me know which one, two or three you like best. In order to win, you need to be a subscriber to my blog. The winner will be announced on Sunday, February 26th.

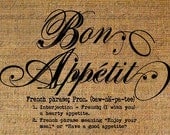
Definition GARDEN Text Typography Words Digital Image Download Sheet Transfer To Pillows Totes Tea Towels Burlap No. 2284 Bon Appetit Definition Defined France French Text Digital Image Download Sheet Transfer To Pillows Totes Tea Towels Burlap No.1683
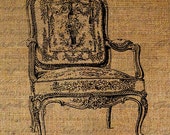
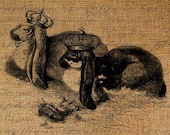
French Ornate Louis Chair Furniture Digital Collage Sheet Download Fabric Transfer Pillows Tote Tea Towels Burlap No. 1568 King and Queen of the Cabbage Patch Lop Eared Rabbit Crown Digital Image Download Pillows Tote Tea Towels Burlap No. 1911

Here are my "Bride" and "Groom" pillow shams that I made using Graphique digital downloads. I also added a bit of bling!!!


Let me know what you think....


Tuesday, February 14, 2012

LOVE it!!!

I just received my MD Anderson Center Children's Art Project iphone cover designed by Kaleb and I LOVE it!!!!

"For more than 37 years, the MD Anderson Children’s Art Project (CAP) has given pediatric cancer patients the opportunity to channel their emotions through artwork. For children diagnosed with cancer, powerful healing therapies don’t always come in the form of surgery, radiation or chemotherapy.  At MD Anderson, there is a program that relies on something entirely different — art."

Proceeds from the sales of all Childrensart.org  items including cards, home decor, jewelry etc support patient and educational programs at MD Anderson.  Your purchase will help enhance patient services thereby benefiting the educational, emotional and recreational needs of these young patients.

Happy Valentines Day with much LOVE by Kaleb.

Let me know what you think....

Monday, February 13, 2012

For Me Or Not For Me - Annie Sloan Chalk Paint

By now, many of you know that I have never tried the real stuff, "Annie Sloan Chalk Paint". I love my homemade chalk paint (HCP) and hadn't given much thought to actually spending the extra $$$ to buy ASCP. But after reading The 411 On Chalk Paint by Mandie from Altard, I had to try it, in order to satisfy my own curiosity. SO, I searched the web and decided to purchase 2 cans from Robyn Story Designs. Not only do they offer the lowest price anywhere online but they also have a flat shipping fee. Additionally, RSD also had the newest color, French Linen which is really what I wanted to try.

Just like a little kid in a candy store, I could hardly contain myself when the box arrived. I tore into it and was pleasantly surprised to see not only the paint but a photocopy of the official ASCP color chart, a color board of real paint samples, instructions on achieving "sample techniques" and "color ideas for 2 color distressing".


I decided to tackle a simple project with one of the recommended '2 color distressing ideas', specifically French Linen over Old White and the piece, my kitchen table.


At first glance, the paint appears to be similar in consistency to my HCP. However once poured, I noticed that its texture is much smoother. I'm wondering if I used a finer unsanded grout in my recipe would it be less gritty and more like ASCP? I elected to roll it on with a smooth foam roller and below is the table top after one coat of ASCP.


I rolled on another coat of Old White and then applied two coats of French Linen. Once dry, I sanded the top coat of French Linen to expose some of the Old White. Unfortunately, I forgot to take a picture prior to applying my Golden Oak wax. Here it is, half & half...


After 'waxing on and waxing off' the darker wax, I applied Minwax Paste Finishing Wax. What I like most about this wax is the quick drying time (10-15 minutes) and it buffs to a brilliant shine.


Below is the completed ASCP table....


According to Annie Sloan, "Painting with our paint should always be a pleasure" and it is. Furthermore, it "is very easy to work with and allows people to be creative as one doesn't get involved with the technicalities of preparation", which is also true. However, the homemade chalk paint recipe that I use, does all of this at a fraction of the cost. Additionally, you have the flexibility of creating every color on the Pantone chart with endless color combinations to achieve a range of decorative and vintage looks.

Project #7 Complete!!!
Let me know what you think.....


Joining the Party...
DIY Club

 
Photobucket

Friday, February 10, 2012

Milestones - Cancerversary & Bloggerversary

Today, I am celebrating my 2 year cancer survivorship, also known as my Cancer-versary.  My date marks the anniversary of my surgery and the date that my cancer was removed.  I was diagnosed on January 28, 2010 and my surgery was performed February 10, 2010.   I have chosen the date of my mastectomy for my milestone even though I still had 16 chemotherapy treatments and 33 radiation treatments ahead of me. On this date, I was a survivor. 

I am not alone in my celebration, my husband, my daughters, my mother, my brothers, my sister (also a breast cancer survivor) and so many relatives and friends also deserve to celebrate.   It is a special day for all.  I will always be reminded of the love, support and prayers from everyone who stood by me through this journey. 

This day also marks the 6 month "Bloggerversary" (anniversary of my blog, I made up the word) launch which is also 'cancer related'.   I started blogging while recovering from my bilateral breast cancer reconstruction with my first post, French Blue ChestI had a terrible reaction to Vicodin and was literally up for 2+ days straight.  So, what else does one do at 3am other than start a blog....It seemed a natural thing for me to do! 

I'm proud that I have over 500+ followers, have had over 65,000+ page views and have now reached over 1,000+ comments in 6 months.  On some days, this blog has given me a reason to get up in the morning or motivation to complete a project.  Knowing that maybe someone is interested in what I have to say or is looking forward to what I've painted or refinished or recycled, brightens my day.

I am reminded each and every day that I am lucky to be alive and I am blessed to have so many wonderful friends and the most unbelievably supportive and loving family. 

Finally, thank you to each and every one of my Followers and my TOP REFERRING SITES....


Have you celebrated any recent milestones?  I would love for you to share them with us.
Let me know what you think....
.


PS.  This is my 100th post!!!

Wednesday, February 8, 2012

"Faux Sew" Pillows

My quest to complete my Guest Room continues.  This pillow caught my eye recently on WhisperWood Cottage and I knew that these quick and easy pillows would fit into my design plan.


My current bolster pillows were wrapped in Battenberg Lace trimmed curtains and tied with grosgrain ribbon as shown below.  So, I just unwrapped them to followed Amy's tutorial.


As part of her Burlap Week @ WhisperWood Cottage, Amy provides a detailed yet simple tutorial for her "Faux Sew" burlap bolster pillow.  Supplies include a bolster pillow, burlap scrap material, scissors, jute twine and a straight upholstery needle. 


As per Amy's tutorial, I eyeballed the amount of fabric and then rolled the fabric around the bolster pillow with the finished burlap edge overlapping the unfinished edge by approximately 2".  With my upholstery needle and twine, I wove my needle up and over the seam from end to end...really easy.


I then wove the needle through in 1" sections around the entire end of both sides allowing me to gather the ends.  


I can't thank Amy enough for this crafty "Faux Sew" tutorial as I am now one project closer to completing my Guest Room makeover.


Project #6 Complete!

Let me know what you think....

Sunday, February 5, 2012

Pillow Talk

On Thursday, I introduced you to Live.Like.You, my new favorite blog. Well, I spent a good two hours reading recent and older posts, looking at Before & Afters and of course, perusing her shop.  It was there that I found her new line of Jill Sorensen Pillows .  These handmade, ribbon detailed pillows with feather down inserts will add a touch of understated elegance to any room and I knew I had to recreate them.


Luckily, I had recently purchased pillow covers for my daughter's room and hadn't figured out what to do with them.  So, off to Joann's to purchase ribbon and iron on adhesive tape. 

This is a NO SEW tutorial....My first step was to decide on the dimensions of the design and my 3" grid ruler was the perfect tool.  I basically folded and pinned the corners and while positioned on the pillow cover, I placed the adhesive tape underneath and ironed. 


I continued this around the corners of the pillow and voila.....


On closer inspection, you might notice that the adhesive can be seen through the white ribbon in a couple of places.  My advice, use a colored ribbon if you are using iron on adhesive, otherwise sew your ribbon on. 


I am pleased with the overall outcome and this tutorial is a really simple way to achieve a designer look on a budget....


Let me know what you think.....

Thursday, February 2, 2012

Live.Like.You & Inspiration

One of my new favorite blogs is Live.Like.You .  The subtitle of the blog reads, "Don't Live Like Everybody - Live Like You!"  Jill Sorenson is the creator of this fabulous blog and is a self proclaimed "design addict".  She believes that "Good design should be available to everybody, on any budget to create a better life and environment for themselves".

Live Like You & Marmalade Interiors

Jill also created LiveLikeYou, an online store where you can find free design vignettes suited to personality types or your favorite movies. From Glamour Girl to Mama Mia to Recessionista (my personal favorite), you can expect room tips, tear sheets, color recommendations and either shop her site or DIY. She hopes that "LiveLikeYou inspires you to find what you love, how you want to live, and kick-starts you to create the home of your dreams!"  She also has a full service residential &commercial design consultation company called company Marmalade Inc.

Additionally and most importantly, Jill gives back!!!  If you have followed my blog for a bit, you know how important this is to me. She co-founded Knock Out Abuse Against Women together with friend Cheryl Masri to raise money for women and children who are victims of domestic violence. One of their programs is Sharing Spaces, that spearheads shelter redesigns with local designers. 

You need to stop by Live.Like.You and take advantage of her Free Design Advice, Paint Color Recommendations and Room-by-Room Designed Vignettes and "get some inspiration"!

Let me know what you think....