Showing posts with label Burlap. Show all posts

Thursday, November 8, 2012

The Gilded Age

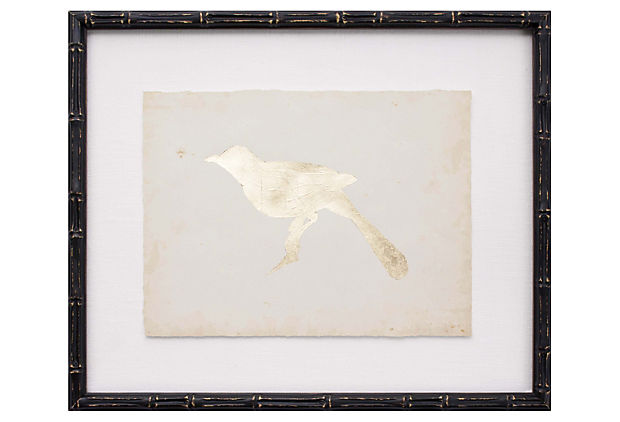
Have you ever received an email from a flash sale site like One Kings Lane or Joss & Main and thought, I can make that?  Well, that's exactly what happened to me the other day when I opened The Gilded Age shop at One Kings Lane.  I fell in love with the gorgeous, gold leaf bird silhouettes by Mirror Image Home.

"This gold leaf bird silhouette adds a glamorous touch to the bird's natural, delicate beauty. On oyster linen with espresso bamboo frame, the art is elegant and ready to hang."  I LOVE them!!!
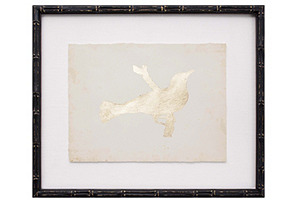
Gold Leaf Bird IXGold Leaf Bird I

However,  I didn't love the price!!!.  The original retail was $360/silhouette and the flash sale price was $189.  So like most DIYers, I decided try to make my own bird art.

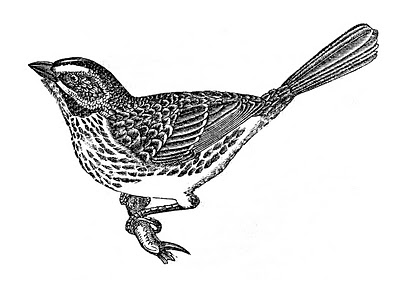
My first stop was The Graphics Fairy to find the perfect bird silhouettes and I did....


My next step was to copy in black and white onto card stock and make stencils.  I also decided that I wanted  more of a rustic feel so I opted to use burlap instead of linen and silver leaf instead of gold leaf. 

So, here are my tools....burlap, silver leaf and adhesive pen, 2 canvases and decorative tacks.  


I adhered the burlap to the canvases with spray adhesive stapling it along the back edge utilizing my gift wrapping skills as shown below.


I then marked off the edges of each canvas in 1 inch sections and with my handy dandy rubber mallet taped in the decorative tacks.


My next step was to trace the silhouette on to the burlap and apply the silver leaf glue with the adhesive pen provided in the package.  Now I must admit, silver leafing on burlap is a bit frustrating.  I think I now know why my inspiration art was done on linen!


The entire project was a bit more time consuming than I had imagined but the bottom line is, I'm very pleased with the outcome.  I especially like the rustic tacking and burlap coupled with the more sophisticated silver leaf.


Let me know what you think....

Heather
vif187
Fridays Unfolded French Country CottagePhotobucketThe Shabby Nestfive days five ways | feature friday free for all Chic on a Shoestring Decorating  Whipperberry 
In The Old RoadHookingupwithHoHshabby creek cottage 
DIY Show Off

Wednesday, February 8, 2012

"Faux Sew" Pillows

My quest to complete my Guest Room continues.  This pillow caught my eye recently on WhisperWood Cottage and I knew that these quick and easy pillows would fit into my design plan.


My current bolster pillows were wrapped in Battenberg Lace trimmed curtains and tied with grosgrain ribbon as shown below.  So, I just unwrapped them to followed Amy's tutorial.


As part of her Burlap Week @ WhisperWood Cottage, Amy provides a detailed yet simple tutorial for her "Faux Sew" burlap bolster pillow.  Supplies include a bolster pillow, burlap scrap material, scissors, jute twine and a straight upholstery needle. 


As per Amy's tutorial, I eyeballed the amount of fabric and then rolled the fabric around the bolster pillow with the finished burlap edge overlapping the unfinished edge by approximately 2".  With my upholstery needle and twine, I wove my needle up and over the seam from end to end...really easy.


I then wove the needle through in 1" sections around the entire end of both sides allowing me to gather the ends.  


I can't thank Amy enough for this crafty "Faux Sew" tutorial as I am now one project closer to completing my Guest Room makeover.


Project #6 Complete!

Let me know what you think....

Monday, January 23, 2012

Repurposed Monday - Lamp Base

Sometimes it is just too hard to let some things go and in this case, it was a black lamp base.  For a number of years it has been sitting in my storage room collecting dust.

Well, I stumbled across a darling lamp in one of my favorite stores, Anthropologie and there it was.....the perfect bunny Lamp.  Unfortunately, the Runway Bunny Ensemble lamp is no longer available at the store or online but here is a photo of it.  Created by the Swedish design team "Front", a cheeky hare proudly dons a top hat (the lampshade) to model it in your home.  At 13.5" H, it was priced at $199.  A little too expensive for a whimsical accent but a great inspiration piece!!!

Runway Rabbit Ensemble Lamp

I could not get it off my mind and a few weeks later while shopping, I came across a darling white ceramic garden bunny.  I really love the crackle and aged finish on my bunny.


It appeared to be the correct size for my lamp base so I bought it and it was. I then adhered to the base with a household glue....a perfect fit. I found a burlap drum shade at Walmart. It is part of their Better Homes And Gardens line and I couldn't pass it up at $9.97.

Better Homes and Gardens Burlap Drum Shade 

I could have kept it simple but decided to add just a touch of black grosgrain ribbon to the top and bottom.  Grosgrain ribbon and glue, the perfect combination!


My 'Runway Bunny Ensemble' lamp is part of my Guest Room Makeover Project that I look forward to sharing with you in the near future.

Project #4 Complete!

What have you repurposed lately? 

Let me know what you think.....I love reading your comments!


Joining the Party.....
Home Stories A2Z
you are talking too much


The Southern Institute
Sunday's Best Linky Party!

Tuesday, January 10, 2012

Wedding Wish Tree Revisited

You may recall the Wedding Wish Tree I made for my niece Laura's bridal shower.  She loved it and asked to include in it the wedding reception.

Given the 200+ guests were expected at the wedding, we needed a bigger tree so I decided using an actual Christmas tree would fit well with the wedding theme of natural elements. 

I first covered the iron base of the artificial tree with burlap ribbon that I pleated and then adhered with my trusty hot glue gun.  It took me less than 10 minutes to complete. 


The mother-of-the-bride and her aunt came over and together we made over 200 tags for the wedding wish tree. 


Dont' you love these darling Place Card holders placed on Burlap.  The bride's proud father, cut the birch at various lengths and then cut a slit into the top to hold the placecard.  


Here is the completed tree that I adorned with a handmade burlap bow at the top and a few 'wishes' for the bride and groom hanging from the Wedding Wish Tree.


Let me know what you think....