Showing posts with label Graphics Fairy. Show all posts

Thursday, November 8, 2012

The Gilded Age

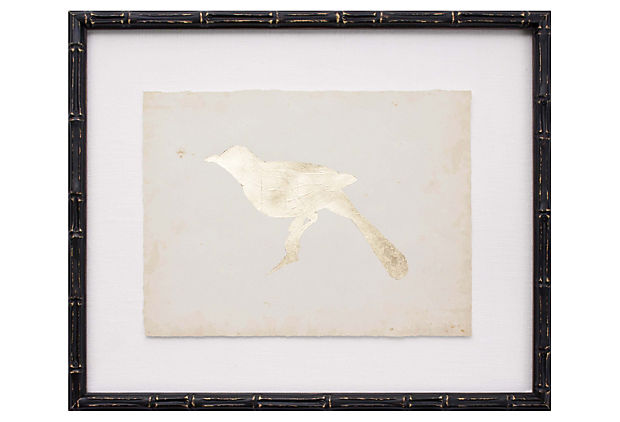
Have you ever received an email from a flash sale site like One Kings Lane or Joss & Main and thought, I can make that?  Well, that's exactly what happened to me the other day when I opened The Gilded Age shop at One Kings Lane.  I fell in love with the gorgeous, gold leaf bird silhouettes by Mirror Image Home.

"This gold leaf bird silhouette adds a glamorous touch to the bird's natural, delicate beauty. On oyster linen with espresso bamboo frame, the art is elegant and ready to hang."  I LOVE them!!!
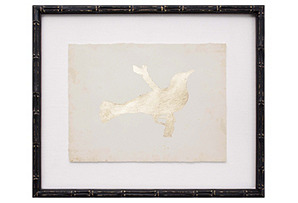
Gold Leaf Bird IXGold Leaf Bird I

However,  I didn't love the price!!!.  The original retail was $360/silhouette and the flash sale price was $189.  So like most DIYers, I decided try to make my own bird art.

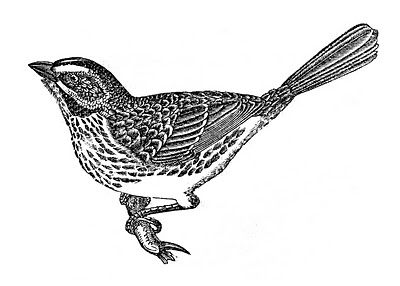
My first stop was The Graphics Fairy to find the perfect bird silhouettes and I did....


My next step was to copy in black and white onto card stock and make stencils.  I also decided that I wanted  more of a rustic feel so I opted to use burlap instead of linen and silver leaf instead of gold leaf. 

So, here are my tools....burlap, silver leaf and adhesive pen, 2 canvases and decorative tacks.  


I adhered the burlap to the canvases with spray adhesive stapling it along the back edge utilizing my gift wrapping skills as shown below.


I then marked off the edges of each canvas in 1 inch sections and with my handy dandy rubber mallet taped in the decorative tacks.


My next step was to trace the silhouette on to the burlap and apply the silver leaf glue with the adhesive pen provided in the package.  Now I must admit, silver leafing on burlap is a bit frustrating.  I think I now know why my inspiration art was done on linen!


The entire project was a bit more time consuming than I had imagined but the bottom line is, I'm very pleased with the outcome.  I especially like the rustic tacking and burlap coupled with the more sophisticated silver leaf.


Let me know what you think....

Heather
vif187
Fridays Unfolded French Country CottagePhotobucketThe Shabby Nestfive days five ways | feature friday free for all Chic on a Shoestring Decorating  Whipperberry 
In The Old RoadHookingupwithHoHshabby creek cottage 
DIY Show Off

Friday, December 16, 2011

Music, Santa & Glitter

Last week, I gave you my first version of Music and Santas. This week, I took it to another level and added a bit of glitter.  I think we all agree that Christmas needs a touch of glitter.....

So, once again, I started with Santa and specifically, this classic Victorian Santa from the Christmas book Chatterbox 1920 that I found at Graphics Fairy.


I then needed to find vintage christmas sheet music for my background and selected Santa Claus So Jolly.  Another great Graphics Fairy download...

I then spread Aleenes Clear Tacky Glue on matting and over the Santa Claus and sprinkled Martha Stewart's Crystal Coarse Glitter over the tacky areas.  In retrospect, I should have used spray adhesive because the picture buckled a bit from the glue. 


I had recently purchased a frame at HomeGoods that needed just a little gold to spruce it up. Rub'N Buff to the rescue once again. Victorian Santa Claus sits proudly on my Chinese Red Victorian front hall chest greeting all during the holiday season.


Let me know what you think....

Come see me at these wonderful parties.

Holiday Craft Party @ Censational Girl
Homemade Projects @ TipJunkie
Brag Monday @ The Graphics Fairy
Creative Bloggers @ Homemaker On A Dime
Made By You Monday @ Skip To My Lou
Just Something I Whipped Up @ Girl Creative
Amaze Me Monday @ Dittle Dattle
Newbie Party @ DebbieDoos
It's Creative Me Monday @ The Southern Institute
Metamorphosis Monday at Between Naps on the Porch
2011 Christmas Home Tour @ The Inspired Room
Mad Skills Party @ Mad In Crafts
Motivated Monday at Be Colorful
Making the World Cuter Monday at Making the World Cuter
More the Merrier Monday at DIY Home Sweet Home Project
Savvy Homemade Monday at Home Savvy A to Z
Tutorials and Tips Tuesday at Home Stories A to Z
Wow Us Wednesdays at Savvy Southern Style
It's A Party on Thursday at A Creative Princess
Show and Share on Thursday at Southern Lovely
Open House Party Thursday at No Minimalist Here
Remodelaholic's Anonymous at Remodelaholic
Addicts (not so) Anonymous on Friday at Addicted 2 Decorating
Inspiration Friday at At the Picket Fence
Feathered Nest Friday at French Country Cottage
Potpourri Friday at 2805
Sunday Showcase Party at Under the Table and Dreaming


I was featured on

Friday, December 9, 2011

Music, Santas and Recycled Frames

I tend to hold onto framed artwork for whatever reason and while preparing for Christmas, I thought I'd create new artwork from my old for my dining room.  As I shuffled through my collection of old art, I stumbled upon these somewhat dated pieces of art with wonderfully ornate carved frames.


Notice the leopard needlepoint area rug beneath the pictures!!!

I was inspired by so many of the lovely holiday images on Graphics Fairy  and decided to incorporate backgrounds of Christmas music as well as my two vintage Santas. I copied two different sheets of music onto a textured cardstock and then transferred my Santas onto the sheet music. 


I removed the current artwork and touched up the frame's intricate detail with Antique Gold Rub 'n Buff.  If you have never used Rub 'n Buff, you have to try it!!!  Rub 'n Buff comes in 16 lustrous wax-metallic finishes that are perfect for antiquing, stenciling and other craft projects and it lasts forever.  You can literally apply it with your finger and just rub it on. 

My Santas now sit proudly in my dining room surrounded by my antique bottle brush Christmas trees.


Let me know what you think... 

Come see me at these wonderful parties.

Holiday Craft Party @ Censational Girl
Homemade Projects @ TipJunkie
Brag Monday @ The Graphics Fairy
Creative Bloggers @ Homemaker On A Dime
Made By You Monday @ Skip To My Lou
Just Something I Whipped Up @ Girl Creative
Amaze Me Monday @ Dittle Dattle
Newbie Party @ DebbieDoos
It's Creative Me Monday @ The Southern Institute
Metamorphosis Monday at Between Naps on the Porch
Meet Me Monday http://youaretalkingtoomuch.blogspot.com/
2011 Christmas Home Tour @ The Inspired Room
Mad Skills Party @ Mad In Crafts
Motivated Monday at Be Colorful
Making the World Cuter Monday at Making the World Cuter
More the Merrier Monday at DIY Home Sweet Home Project
Savvy Homemade Monday at Home Savvy A to Z
Tutorials and Tips Tuesday at Home Stories A to Z
Wow Us Wednesdays at Savvy Southern Style
It's A Party on Thursday at A Creative Princess
Show and Share on Thursday at Southern Lovely
Open House Party Thursday at No Minimalist Here
Remodelaholic's Anonymous at Remodelaholic
Addicts (not so) Anonymous on Friday at Addicted 2 Decorating
Inspiration Friday at At the Picket Fence
Feathered Nest Friday at French Country Cottage
Potpourri Friday at 2805
Saturday Nite Special at Funky Junk Interiors
Sunday Showcase Party at Under the Table and Dreaming


Sunday, October 9, 2011

Just A Little Something On Sunday

I've been looking for an affordable crewel pillow for some time now and I finally found one at TJMax.  I just couldn't resist it, especially at $24.99.  The design and colors were perfect for my family room.


However, it really didn't work on my dark sofa.


I have been planning on slipcovering the sofa for some time now but just haven't gotten around to it.  My temporary fix was to lighten the overall look with brighter pillows.  I used Graphics Fairy clipart on painters cloth pillows that I whipped up.  Here is the clipart I chose.  I love the soft colors and I thought the eggs complimented my new bird crewel pillow nicely.


I removed the current pillow forms and reused them.  NOW, I can't stress this enough.....make sure when using artwork with words that you print the downloaded artwork in the reverse.  I wasted two pieces of transfer paper printing the artwork backwards.....FRUSTRATING!


It then dawned on me that I could extend the use of these summer themed pillows by printing a fall themed print on the reverse. I can't wait to show you the completed Thanksgiving themed pillows closer to the holidays.

In the meantime, take a look at my sofa transformation....


Voila!!! Let me know what you think....